

Whether you’ve budgeted $500 for a new machine or given yourself $1200 to spend, our editors show you how to create the best system for the money.
Nate Ralph

The perfect PC means different things to different people. If you search hard enough, you may find a factory-made ma chine that matches your ideal, at a reasonable price. But if you'd rather not wait for a major retailer to hit all the right notes, consider building your own system.
Don't worry--putting together a PC is a lot easier than you might think. And there are plenty of good reasons to do it.
If you've ever had to ship your computer back to the manufacturer for a checkup, the experience may have encouraged you to think seriously about rolling up your sleeves and doing your own troubleshooting. Lengthy turnaround times, or hours spent sitting on hold with customer service are maddening enough. But if your machine happens to be out of warranty--or didn't have a very good warranty to begin with--the cost of getting a part or the entire system replaced could be more than you bargained for.
Most of all, building your own system is fun. Technology has be come increasingly complex, but PCs are modular--and with our step-by-step guide you can put together a dream machine that's just right for your needs and budget.
Note: The do-it-yourself process is a double-edged sword. Whether you've had positive customer service experiences in the past or not, having a single seller to turn to if your equipment goes haywire can simplify troubleshooting (and replacing parts). Getting a faulty component replaced on a home-built machine entails working with individual product manufacturers, which may increase the overall hassle.
But to help those who've never built a PC before, or just need to brush up on their technique, we've created a three-part video series that walks you through the process.
How to Build Your Own PC, Part 1
How to Build Your Own PC, Part 2
How to Build Your Own PC, Part 3
Caveats aside, you'll be hard pressed to find a computer that suits your needs better than one you build yourself. The first and most important step in building a PC is to know exactly what you want it to do. The only thing worse than wasting time assembling a subpar system is spending far more money than you need to, cobbling together a quad-core behemoth that you'll be using just to check your e-mail.
Once you have identified the functions that you want your PC to perform, decide how much you're willing to spend.
A system designed for gaming or video editing will require a larger investment than one intended for nothing more demanding than surfing the Web. Our parts lists enumerate the components that we chose, and explain our rationale--beyond sticking to our budget--for choosing each part.
Testing
For our tests of our DIY system, we used the PCWorld Labs' WorldBench 6 benchmark suite. WorldBench 6 gauges real-world system performance on a series of tests based on common applications. We calculate WorldBench 6 scores by timing how long a machine takes to complete the various tasks, and weighing those numbers against the performance of a baseline system. We also conducted a gaming test, using Unreal Tournament 3 to provide us with a graphical performance benchmark.
With test results in hand, we compared the data for the PC that we built from scratch against the average for machines at similar price levels. All of the competitors we considered were re cently reviewed machines, available at retail.
Our PC vs. the Competition at $500
On a $500 budget, PC manufacturers have a clear advantage: By ordering in bulk and maintaining direct control over their supply chain, they can buy components at lower prices than can an individual user shopping for parts online. On the other hand, they have to pay for assembly (do-it-yourselfers work for free) and of course they have to build in a profit margin.

Overall, our results weren't bad. On our WorldBench 6 tests, our $500 system scored 3.7 percent below the average mark for budget desktop PCs in the same price category.
Graphics performance was better--though not exceptionally so. We couldn't eke out a playable frame rate, regardless of setting, which is normal with integrated graphics. Despite such results, our $500 PC still outperformed the category average in gaming frame rates by a considerable amount.
Limitations in gaming performance aside, our $500 ma chine does excel at tackling high-definition content. Our motherboard's integrated graphics chip offers MPEG-2 and H.264 decoding, which helps lighten the load on the CPU. The end result is smooth, stutter-free playback, even at higher resolutions. You'll also have enough power to run multiple displays--an arrangement that's handy for getting work done when you aren't watching your favorite flicks.
Despite its marginally lower performance, our $500 ma chine has a few advantages over competing prefab systems. Machines in the budget desktop PC category generally get tucked into petite, custom cases that don't offer much room to grow. Our Rosewill chassis isn't much larger than the average, but it can accommodate various components that you may want to introduce later on. Likewise, our motherboard's integrated graphics system leaves PCI slots available for adding a discrete graphics card, if we'd eventually like to make our rig a bit friendlier for gaming or video editing.
Our PC vs. the Competition at $1200
Though our $500 machine struggled a bit to keep up with its low-cost preassembled peers, its $1200 sibling had no such trouble. The higher price ceiling allowed us to focus on getting stronger performance, while building a machine that was quiet, user friendly, and reasonably attractive.

Our $1200 machine's WorldBench 6 performance was almost 4 percent better than the average for the mainstream desktop PCs category. That's a marginal bump, but bear in mind that the Core i7-875K processor we used is unlocked and thus overclocker-friendly. If you're feeling a little ad venturous, you can easily push the CPU beyond its stock clock speeds and get a little more mileage out of your system. You can ob tain even more legroom by upgrading from the inexpensive CPU cooler we selected to something a bit larger. Even if you'd rather not dabble with overclocking, you won't find it easy to beat our performance results at this price.
Graphics performance was also noteworthy, which will please builders looking to play some games on their rig. Our $1200 PC's XFX Radeon HD 5850 trumped the mainstream PC category average in our gaming tests, across the board.
As with our budget model, taking the do-it-yourself route enabled us to choose a fairly versatile case. The Zalman Z7 chassis has plenty of bays for future expansion, while muffling much of the racket that the components make.
Parts List: $500 PC

It's not easy to build a PC for just $500 in parts. No matter how you slice it, you're going to have to make some sacrifices. That said, we were impressed at how much computing power we could get for $500. Here are the parts we chose for our $500 PC build, along with the reasons we picked them. The prices listed here are ones we found at reputable online stores; the numbers may have shifted by the time you read this.
CPU
AMD Athlon II X3 445 (3.1GHz)
$90
At the low end of the price range, AMD's processors provide really good bang for the buck. What's more, choosing this CPU enables us to use an affordable motherboard with very good integrated graphics.
CPU Cooler
Stock part (see below)
$0
The AMD Athlon processor that we chose comes with a stock CPU cooling fan, so we don't have to spend any extra money to get this component.
Motherboard
Biostar TA890GXB
$95
Built on the MicroATX design, this motherboard offers AMD's latest chipset, support for the full range of AMD processors, and Radeon HD 4290 integrated graphics (one of the best integrated graphics options available).
RAM
Crucial DDR3 1333MHz (two 1GB modules)
$57
We'd prefer 4GB of RAM, but our budget won't allow it. Crucial makes reliable RAM at a fair price, and this pair of 1GB DDR3 memory sticks will get the job done.
Case
Rosewill R102-P-BK
$30
It's not the best case around, but it fits our MicroATX-based motherboard nicely, it's inexpensive, and it's not ugly. On our tight budget, that's about as much as we can hope for.
Power Supply
Cooler Master Elite 460W
$30
With the components we're using, we don't need a power supply with a lot of wattage. Instead, we need one that is inexpensive and reliable, and Cooler Master's 460W model fits the bill.
Graphics
Radeon HD 4290
(integrated into motherboard)
$0
In lieu of a graphics card, we're relying on the motherboard's integrated graphics. If you're a gamer, you'll want to invest $100 in a decent graphics card--but that would take us way over our budget.
Hard Drive
Seagate Barracuda 7200.12 500GB
$49
Hard-drive storage is amazingly inexpensive these days. This 7200-rpm drive from Seagate performs quite well, holds half a terabyte, and costs about half a C-note.
Optical Drive
Asus DVD-E818A6T
$17
This is an extremely simple and basic DVD-ROM drive. It reads DVDs and CD-ROMs, but it doesn't burn discs, nor does it play Blu-ray discs. It costs only $17, which is perfect for our tight budget.
Operating System
Windows 7 Home Premium 64-bit (OEM)
$100
Linux costs less, but we want compatibility with mainstream apps. Despite having just 2GB of RAM, we opted for the 64-bit version of Windows 7, for its slight se curity edge, and for future upgradability.
Keyboard
Microsoft Comfort Curve Keyboard 2000
$15
Shopping carefully online, we found this perfectly adequate keyboard for an astonishingly low $15. At that price, it's a steal!
Mouse
Microsoft Comfort Optical Mouse 1000
$10
It isn't our favorite mouse, but it's better than the generic low-cost mice that ship with most prefab $500 PCs. And because it's dirt cheap, it helps us keep our system's overall cost under $500.
Total = $493
Parts List: $1200 PC

$1200 gives us room to choose more powerful, more visually appealing, and less noisy PC parts, for a better overall experience. This PC should be able to handle almost anything you throw at it during the next few years, from video conversions to high-end PC games. The result: a PC that truly does it all, and does it well. Here are the parts we chose for our $1200 PC, along with our rationale for choosing each. We found the prices listed here at reputable online stores; the precise numbers may have shifted by the time you read this.
CPU
Intel Core i7 875K (2.93GHz)
$310
Priced at just over $300, this Intel Core i7 processor has four cores (eight threads) to deliver plenty of power. And since it's unlocked, it gives overclockers lots of options.
CPU Cooler
Cooler Master DP6-9EDSA-0L
$11
We opted for a fairly inexpensive CPU cooler. It's fairly quiet and does a good job of keeping the processor cool, but if you plan to overclock the CPU, you'll want something a little more substantial.
Motherboard
Asus P7P55 LX
$111
This motherboard has a fanless de sign, and its two graphics slots let you run dual ATI graphics cards. The P7P55 LX supports up to 16GB of RAM and any Core i5 or i7 processor that uses the LGA 1156 socket type.
RAM
OCZ Platinum DDR 1333MHz (two 2GB modules)
$105
4GB is enough for any modern home PC, and we'll have two slots open, so we can double our system's memory later by adding another pair of 2GB memory sticks.
Case
Zalman Z7 Plus Black ATX Tower
$67
The Z7 Plus is a great midsize tower PC case for the price. It looks nice, has thick sides to dampen noise, and includes several large (120mm) fans to keep things cool.
Power Supply
Antec EA650 650W
$80
Antec's EarthWatts power supplies are energy-efficient and reasonably priced. We don't need 650 watts for the components we've chosen, but it's smart to build in a little breathing room for future upgrades or overclocking.
Graphics
XFX Radeon HD 5850
$285
This is one of the best sub-$300 graphics cards out there. It's quiet, it supports DirectX 11, and it can run every modern game, even at high detail levels.
Hard Drive
Seagate Barracuda 7200.12 750GB
$60
This drive resembles the excellent workhorse we used in our $500 PC, only with 50 percent more storage capacity. We wanted to get the 1TB model, but we're pushing the $1200 limit as it is.
Optical Drive
Asus DRW-24B1ST
$23
This model is quite capable. It burns single and double-layer DVDs as well as CDs, so with the exception of Blu-ray support, it does everything you could want of an optical drive.
Operating System
Windows 7 Home Premium 64-bit (OEM)
$100
To make full use of our 4GB of RAM, we want the 64-bit edition of Windows 7. Even if our configuration were more modest, we'd still want 64-bit: It's the future.
Keyboard
Microsoft Comfort Curve Keyboard 2000
$15
This very serviceable keyboard has an unbeatable price. (It's the same one we chose for the $500 PC.) We couldn't find anything better that didn't cost at least $20 or $30 more.
Mouse
Logitech MX 518
$36
Our more expensive PC requires a better mouse than the $500 system's Microsoft Comfort Optical Mouse 1000. Logitech's MX 518 is large and comfortable, tracks smoothly, and is sensitive enough for gamers.
Total = $1203
Tools
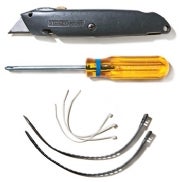
To open the boxes that components arrive in, keep a box cutter or a sharp knife handy. You'll also need to cut away any cable ties that stand in the way.
Quite a few screws will accompany each of your components, and they may not be interchangeable. Keeping things organized will simplify your work. You'll need aPhillips-head screwdriver to put everything together, so be sure to have one available.

Finally, have a few twist ties and cable ties on hand. Building a PC can be messy work, with a rat's nest of wires protruding from the power supply and plugged into your components. But besides being annoying while you're mucking about inside the case, tangled wiring can cause components to get hotter than they otherwise would while your PC is running. Tying back cables to keep them out of the way will keep cool air flowing throughout the chassis.
Step by Step
Assembling a PC isn't as hard as you might think. Just clear a couple hours from your day and find a big, clean space to work in. Following are the nine steps you'll take to assemble your homemade PC. As you'll see, it's not very technical and doesn't require special tools or skills. For a more detailed demonstration of building a PC, see our video series.
How to Build Your Own PC, Part 1
How to Build Your Own PC, Part 2
How to Build Your Own PC, Part 3
1. Install the power supply: Line up the power supply's holes with the mounting space in the case, and screw it in.
2. Install the motherboard: Screw the spacers into your case, and then screw the motherboard onto the spacers. Plug the power supply and case buttons (power, reset) into the motherboard.
3. Install the CPU: Gently place the processor in the socket, and fold the lever down to lock it in place. Place thermal grease on the CPU if necessary, and then snap or screw on the CPU cooler.
4. Mount the CPU cooler: Position the CPU cooler over the mounting holes, adding a dab of thermal paste to the CPU if necessary. Some coolers have snaps and some have screws; either way, tighten it down securely.
5. Install the RAM: Line up the notch in the RAM with the slot and press firmly until it snaps into place.
6. Install the hard drive: Screw the hard drive into the mounting brackets (usually in the front of the case). Attach the SATA power cable from the power supply, and the SATA data cable to the motherboard.
7. Install the optical drive: If you have rails, screw the drive onto them and slide it into the case. If not, slide the drive in and screw it into position. Attach the SATA power cable from the power supply and the SATA data cable to the motherboard.
8. Install the graphics card: If you're using integrated graphics, you can skip this step. Push the graphics card firmly down to seat it in the large PCIe slot closest to the CPU. Then plug in the power connectors from the power supply.
9. Install the operating system: Attach your keyboard, mouse, and monitor; then turn on your PC and put the Windows disc in your optical drive. Follow the prompts to install your OS, and you're done!
No comments:
Post a Comment